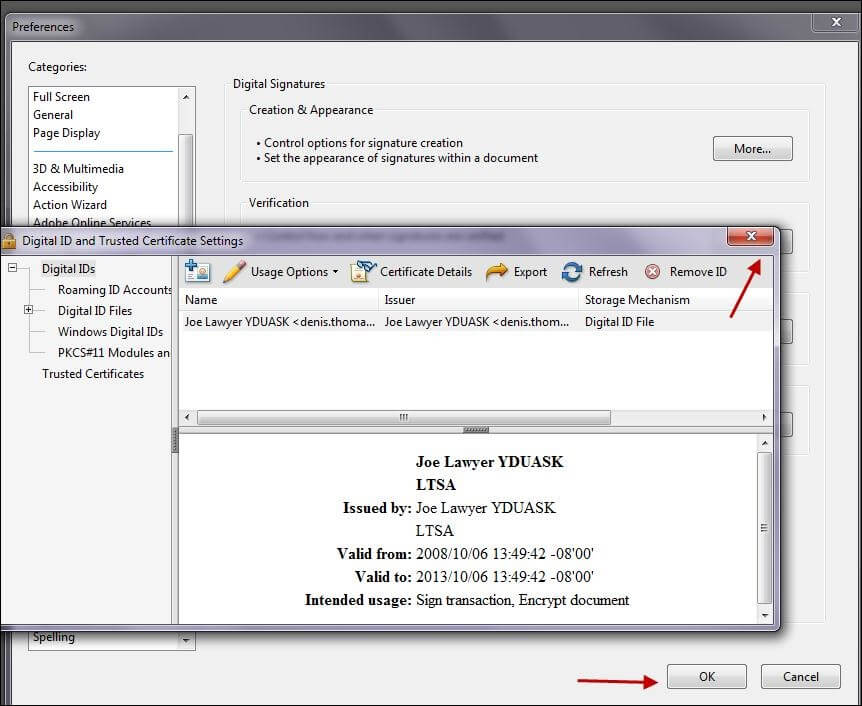
To install a digital certificate:
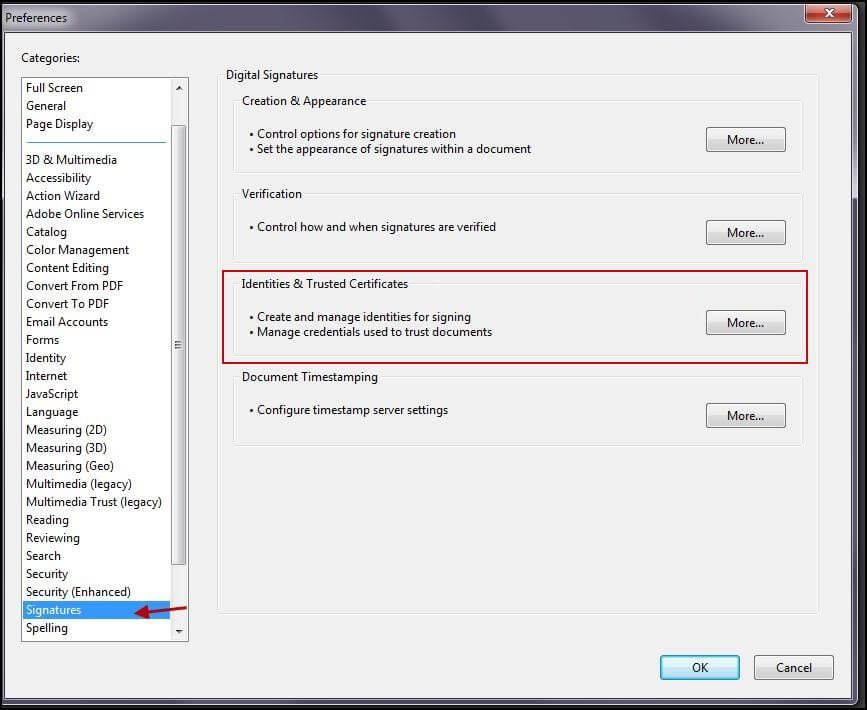
In Acrobat, select Edit > Preferences
Select Signatures > Identities and Trusted Certificates > More
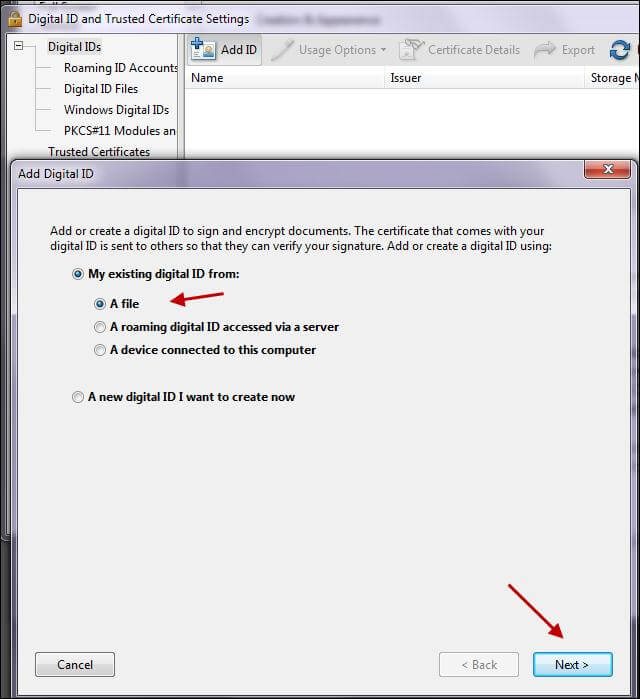
In the Digital ID and Trusted Certificate Settings dialog box, click + Digital IDs and then click the Add ID icon

In the Add Digital ID dialog box, select My existing digital ID from: and then A file and click Next
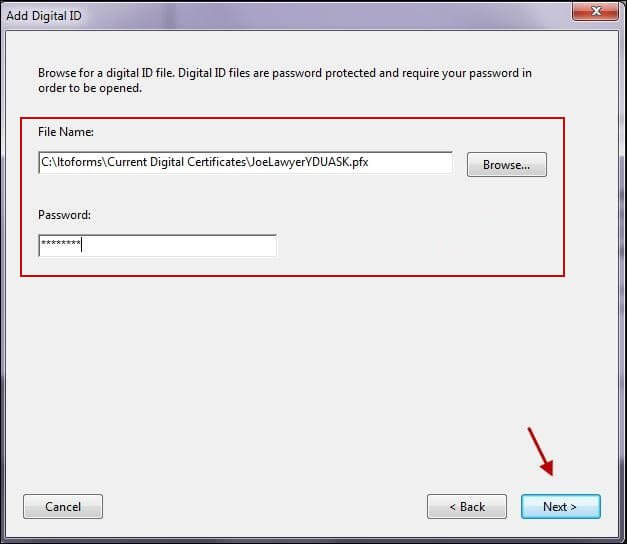
In the Browse for a Digital ID file dialog box, click Browse and navigate to the folder where you stored the file you received from Juricert e.g. C:\MyCertificate\mynameSerial#.pfx
Double click the file name which will now appear in the dialog box
Enter your Juricert Digital Certificate password (which you provided when you requested the certificate) and click Next
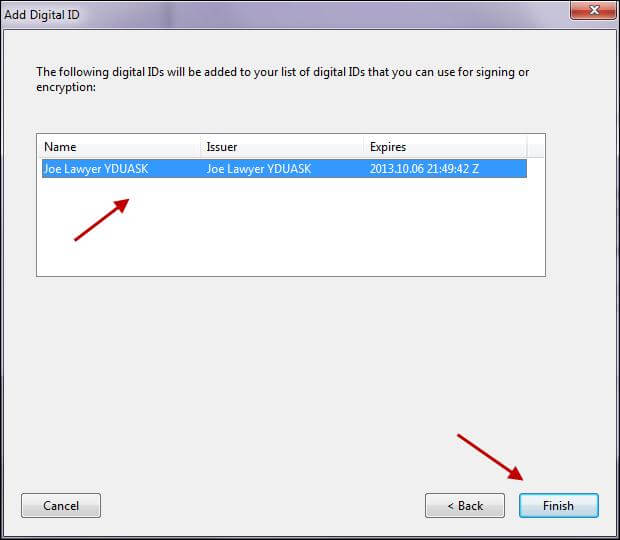
Acrobat will display your new digital ID in the Add Digital IDs dialog box, click Finish to return to the Digital ID and Trusted Certificate Settings dialog box which now includes your new digital ID
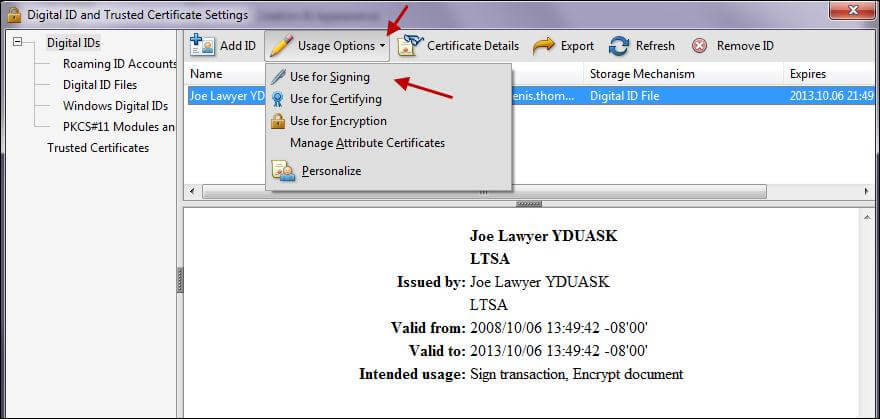
Click once on your digital ID to highlight it, then click the Usage Options icon and select the option Use For Signing to establish this as the default digital ID you will use to digitally sign electronic forms
Close the Digital ID and Trusted Certificate Settings dialog box and click OK in the Preferences dialog box
