On This Page
Survey Sites
New concept of Survey Sites to keep work organized in a geospatial file folder.
- Sites are mandatory
- A Site can have zero, one or many plans within it

Survey Sites - Map View
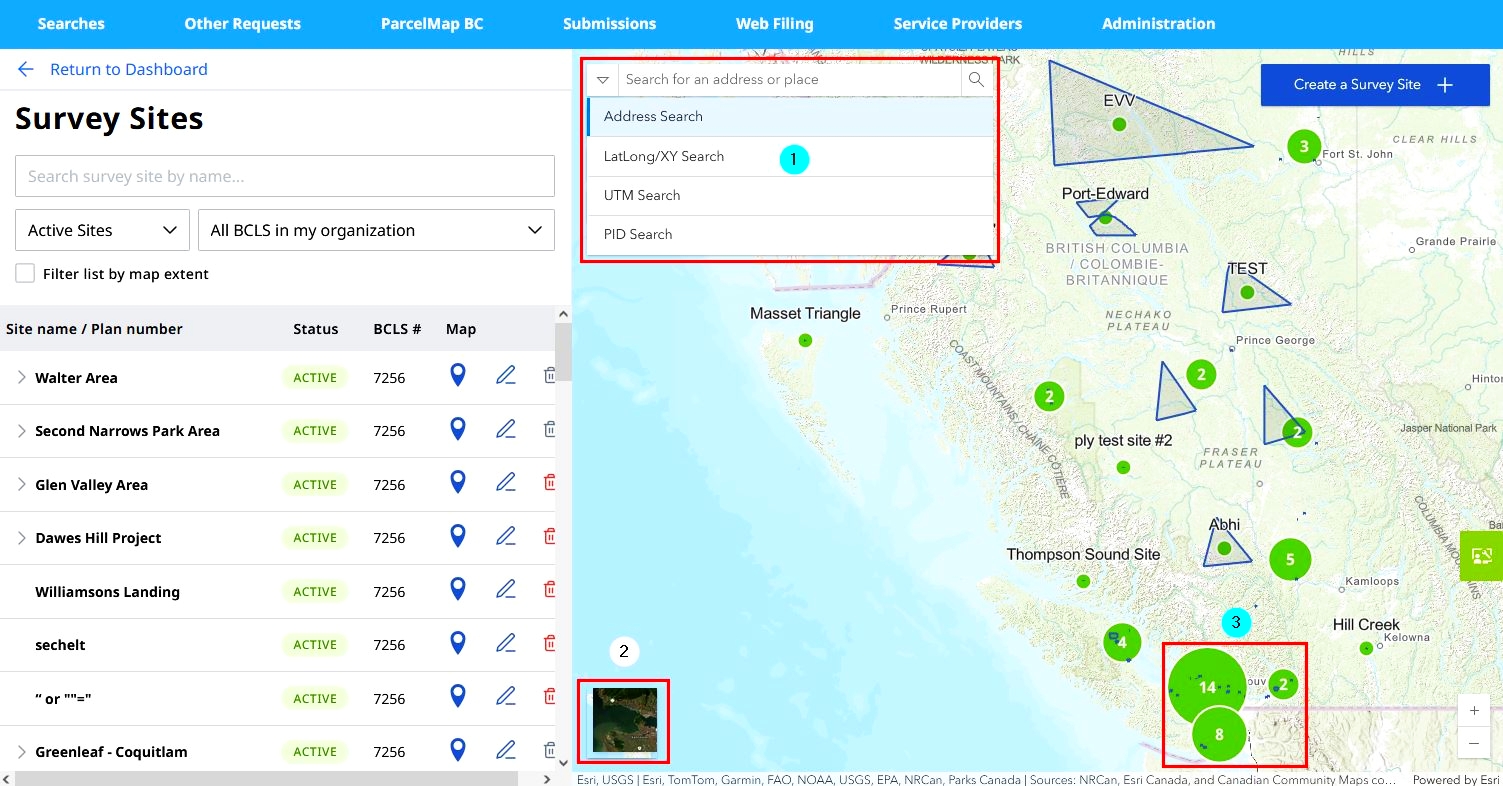
- Four Locate Map methods are available when the down arrow is clicked.
- Basemap selector can switch between satellite imagery and topographic basemap.
- Sites are shown clustered until zoomed in and will then be visible individually.
Survey Site - Search
There are several ways to perform Survey Site searches ranging from manual text search or through the use of filters.
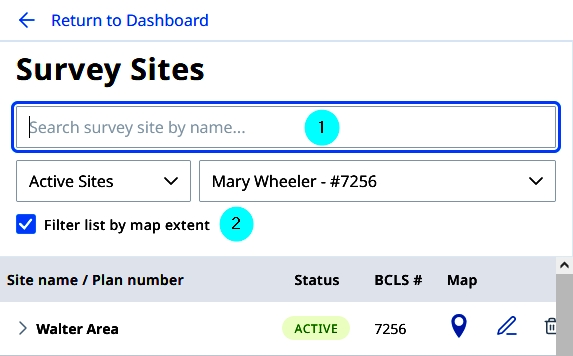
- On the Site List Search box, click Search survey site by name.
- The list can be filtered by extent.
- Filter is available to display Active and Inactive Sites.
- Filter is available to display ALL BCLS in my organization or select a specific BCLS by name or commission number.

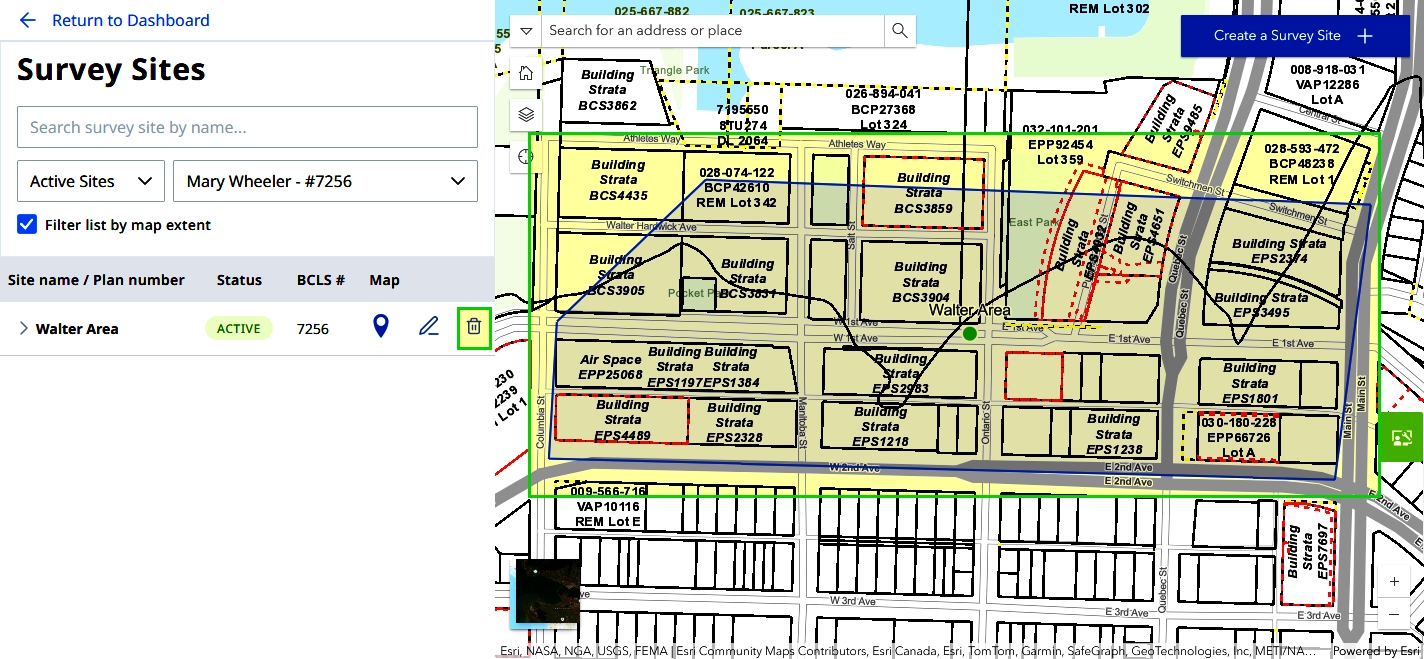
Blue placemark zooms you to the site.
If the display is not working, press F5 and try again. It should fix an occassional issue wherein the 'zoom to' stops working temporarily.
Delete Icon | Trash Can displays in Red if you can delete and Gray if you cannot.
You cannot delete a site if a plan is enabled for submission.
Several Locate Map methods are available.
- Text input with magnifying glass icon
Address
Latitude | Longitude
UTM
Parcel ID (PID)
Search by PID can be performed with or without dashes, and does not require leading zeroes.

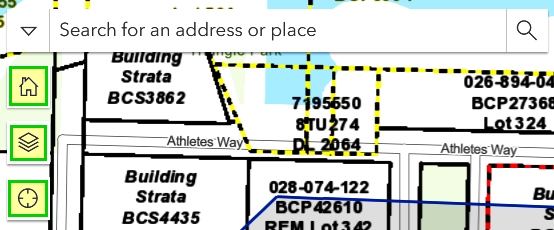
- Zoom extent of Province using the house icon
- A layer selector using the three (3) layers icon
- Zoom to extent of all sites using the target icon
Create Survey Site
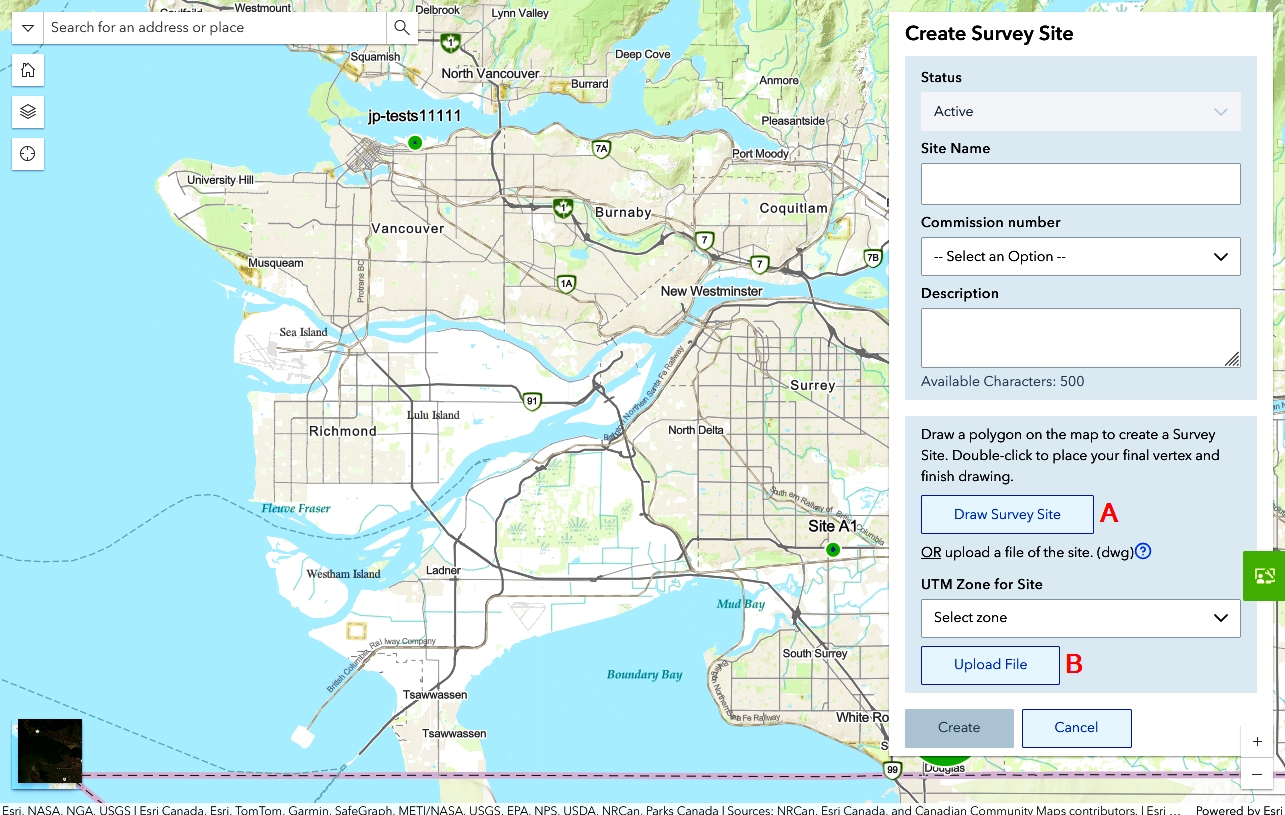
There are two options to create a survey site. Option A is to draw the survey site. Option B is to upload a drawing file (*.dwg) of the site.
Option A
Click Create a Survey Site +.
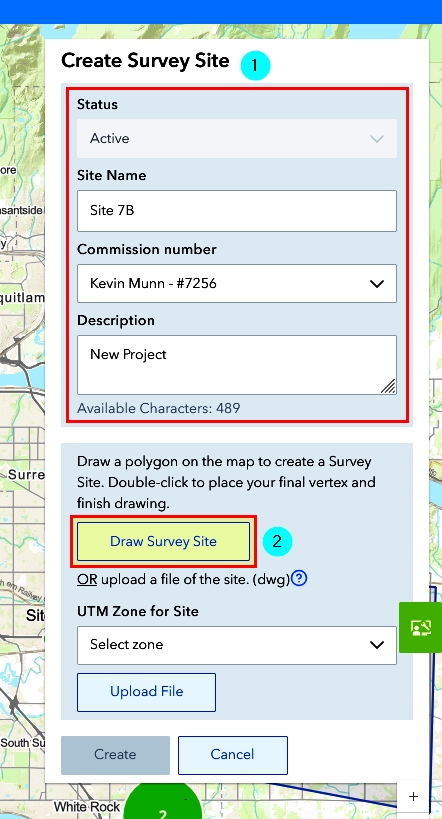
- Fill in a site name. Associate to a land surveyor if not yourself. Enter a description for your own reference (it will be visible and searchable on the dashboard).
- Click Draw Survey Site.
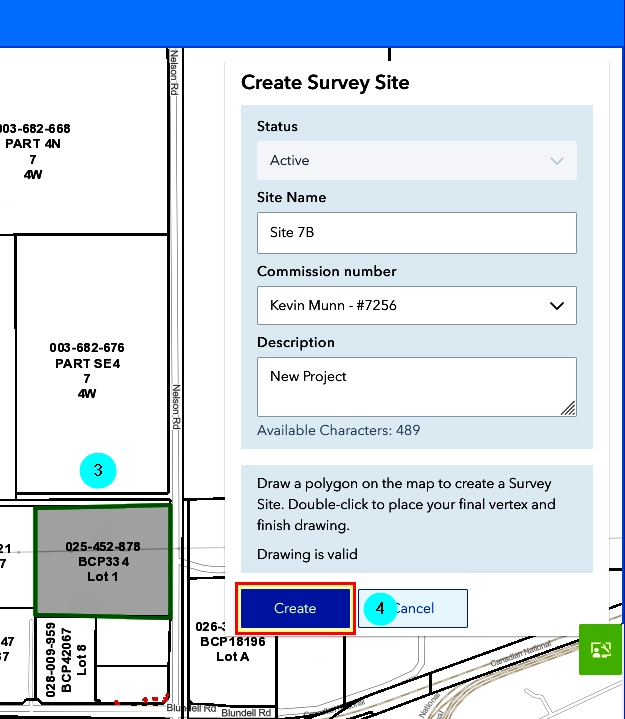
- Draw a polygon on the map to create a survey site.
- Click Create.

Option B
Click Create a Survey Site +.

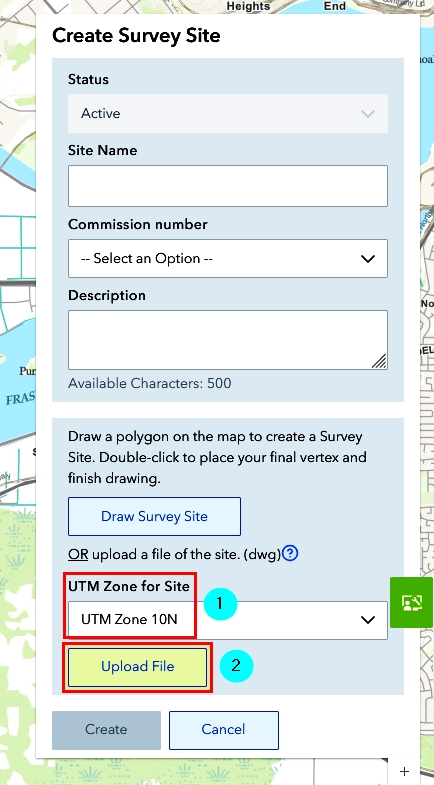
- Select the UTM Zone for Site
- Click Upload File
- Select the drawing file (*.dwg), then click Open
The drawing file must contain the shape for the survey site on the PMBC_SURVEY_LIMITS layer. This will allow the use of the DWG prepared for the dataset to define the Survey Site.
Drawing file requirements can be found here, and ParcelMap BC (PMBC) Layer requirements here.
Edit Survey Site
- Click on the green dot at the center or anywhere inside the site polygon
- On the menu, select Edit Survey Site
- You can edit - Status (Active, Inactive), Site Name, Commission Number, Description, the shape, size and location of the site on the map
- On the map, click the grips to change the size, single-click the parcel to get to the vertices editing, then single-click off the shape to complete. Right-click a vertex to delete or click a white dot to add a new vertex
- Click Update or Cancel

Delete Survey Sites
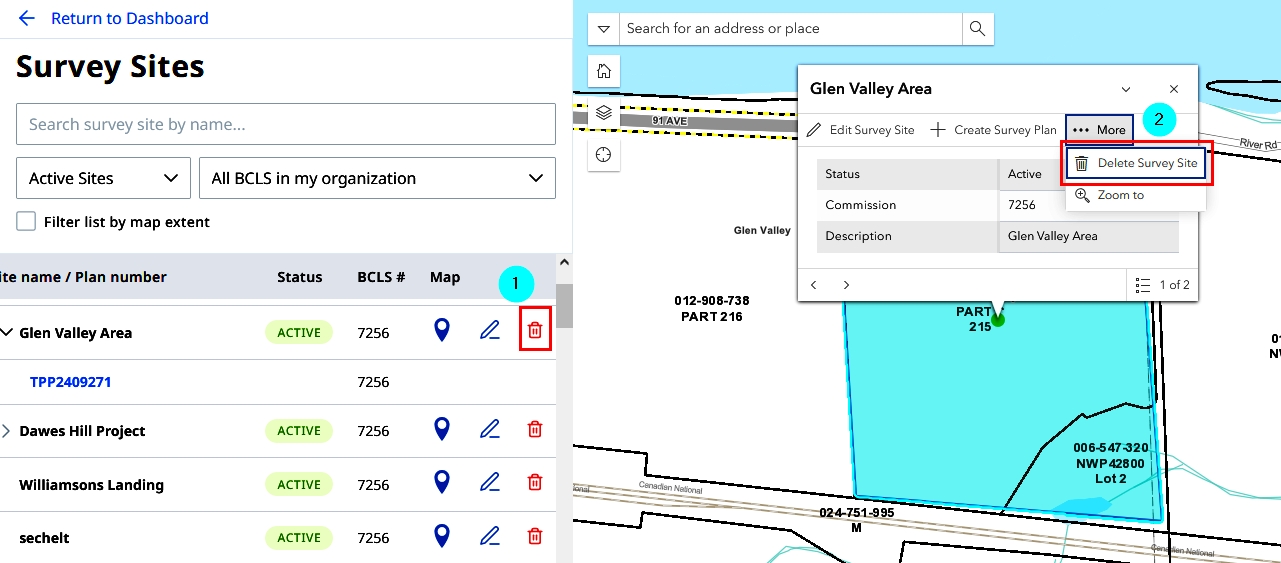
There are two locations to delete a site on the map
- Site list on the left
- Clicking on the parcel, then on the pop-up menu, the option to delete is available
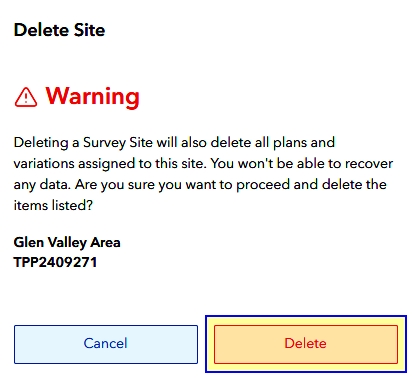
3. Confirm the deletion of the survey site
This action is not reversible.
